Welcome to my Stamina Arcanist guide! This is a basic guide to beaming your foes to death with the power of your mind
This guide is mostly designed for PvE group play but can work well for solo play as well. (Though for extensive solo play, you may consider making some adjustments for survivability)
This guide is updated for U45 (March 2025)
Table of Contents
Arcanist Basics
Arcanist skills are themed based on Daedric Prince Hermaeus Mora, dealing with fate and knowledge, and summoning runes and tentacled creatures to assault enemies. Arcanists build much of their damage into one particular skill, their Fatecarver beam, a very powerful 4.5-second channel. Because arcanists spend so much time channeling this skill, they’re able to do strong damage with much simpler rotations than other classes. Arcanists are also able to build fairly tanky, as their main spammable skill also heals them, and one morph of their Fatecarver beam also provides a big damage shield. Damage-wise, arcanists tend to be especially good at:
- AoE damage: Arcanists do incredible area-of-effect (AoE) damage, with most of their highest damage skills (including the Fatecarver channel) able to hit multiple enemies at once
- DoT damage: Arcanists’ Fatecarver channel also allows them to do excellent damage-over-time (DoT) damage
- Midrange combat: While Fatecarver doesn’t have quite the range of proper ranged skills, it can still travel much farther than melee skills, allowing arcanists to hit enemies from moderately far away
Gear
Basics
- We’ll use mostly medium armor. The Medium Armor skill line provides damage bonuses and stamina recovery that will be very helpful to doing as much damage as possible and keeping up our resources
- One or two light armor pieces can be helpful as well, as the Light Armor skill line provides penetration, one of the most potent of all stats. Most endgame builds will use one light armor piece and six medium
- We’ll use dual wield daggers on our frontbar. Dual daggers will provide the best damage stats of any weapon, mostly because of the Twin Blade and Blunt passive providing a large critical chance bonus
- If you’d like, you can also use a different weapon such as a two-handed greatsword or a bow. These will generally do a little less damage, but they’ll still do just fine
- For our backbar weapon, inferno staves will the most effective option for an arcanist, but two-handed greatswords or bows will also do nicely. This guide will favor the optimal inferno staff; however, a few different setup options will also be shown for greatswords and bows
- Note that despite the magical inclination of a staff, we can still use a staff on a stamina-based build. There’s no penalty or disadvantage for doing so
Gear Setups
There are many great options for gear. These are some of my favorites that will be especially effective, but experiment with other sets and find what works best for you!
Starting Gear
Try this setup until you reach CP 160 (the gear cap). These sets are all craftable! Ask for help in guild chat or Discord if you’d like someone to make them for you. The Training traits will get you a bunch of extra XP
If you have some extra skill points available to invest in the Light Armor skill line, swapping the head and/or shoulder piece to light armor will usually yield a little bit more damage
This setup uses Shattered Fate for a huge penetration buff to tear through enemies’ resistances, and Adept Rider for extra movement speed, perfect for new characters that tend to struggle to move quickly around the world. Night Mother’s Gaze is just filler for our last two pieces, providing a little extra crit chance
| Gear Slot | Type | Set | Trait | Enchant |
|---|---|---|---|---|
 Head Head Shoulders Shoulders | Medium | Night Mother’s Gaze | Training  | Max Stamina  |
 Chest Chest Hands Hands Waist Waist Legs Legs Feet Feet | Medium | Adept Rider | Training | Max Stamina |
 Neck Neck | Shattered Fate | Robust  | Stamina Recovery  | |
 Ring Ring Ring Ring | Shattered Fate | Robust | Weapon Damage  | |
 Front Main Hand Front Main Hand | Dagger | Shattered Fate | Training  | Poison  |
| Front Offhand | Dagger | Shattered Fate | Training | Flame  |
  Back Weapon Back Weapon | Inferno Staff or 2H Sword or Bow | Shattered Fate | Training | Weapon Damage  |
Alternatives
You can substitute Adept Rider with:
- Order’s Wrath for extra damage
- Heartland Conqueror for a small amount of extra kill XP
Intermediate Gear
Once you hit CP 160, swap off your training gear and set up for pure damage! This gear will serve you well through the vast majority of content throughout the game
If you have some extra skill points available to invest in the Light Armor skill line, swapping the head and/or shoulder piece to light armor will usually yield a little bit more damage
This setup uses Shattered Fate for a huge penetration buff to tear through enemies’ resistances, and Order’s Wrath for big bonuses to our critical hits. Night Mother’s Gaze is just filler for our last two pieces, providing a little extra crit chance
| Gear Slot | Type | Set | Trait | Enchant |
|---|---|---|---|---|
| Head Shoulders | Medium | Night Mother’s Gaze | Divines  | Max Stamina |
| Chest Hands Waist Legs Feet | Medium | Order’s Wrath | Divines | Max Stamina |
| Neck | Shattered Fate | Robust | Stamina Recovery | |
| Ring Ring | Shattered Fate | Robust | Weapon Damage | |
| Front Main Hand | Dagger | Shattered Fate | Precise  | Poison |
| Front Offhand | Dagger | Shattered Fate | Charged  | Flame |
| Back Weapon | Inferno Staff or 2H Sword or Bow | Shattered Fate | Infused  | Weapon Damage |
Alternatives
I recommend the above gear for the simplicity in acquiring it, but here are some additional options
- Briarheart: Provides some extra healing along with extra damage
- Leviathan: Provides a big stat boost, somewhat similarly to Order’s Wrath
If you’re ready for vet dungeons, consider swapping out your Night Mother pieces for a monster set. These basegame monster sets are some of the easiest ones to get but are still quite powerful
Advanced Gear
Consider this setup once you have some trials and veteran dungeons under your belt. This setup uses very optimized sets and traits but will require significant trial and dungeon farming
The gear listed in the Intermediate Gear section is entirely adequate for most content in ESO. The gear listed below will often provide noticeably more damage, but crafted gear will be plenty for anything short of seriously dedicated veteran content. If you’re not interested in vet content and you’re not interested in farming, you can skip this section!
- This setup uses Ansuul’s Torment, which provides a flat 7% bonus to our damage. You can get a huge additional 7% bonus by interrupting enemies, but this is not a priority; we’re wearing this set mostly for the always-on bonus
- We also have Deadly Strike, which will cause several of our skills, most notably Fatecarver, to do lots of extra damage
- Velothi Ur-Mage’s Amulet is an excellent mythic that gives a flat 15% damage bonus as well as the Minor Force buff for extra critical damage and a big penetration bonus to tear through enemy resistances; however it has the drawback of mostly negating the damage of our light attacks
- Despite the damage negation, make sure to use light attacks anyway, because light attacks proc our weapon enchants and also cause us to generate ultimate
- Velothi is a staple of Arcanist builds specifically, since our long Fatecarver channels mean we weren’t going to be doing as many light attacks in the first place!
- The Crushing Wall arena weapon will cause our
 Elemental Blockade skill to do lots of extra damage
 - Finally, we’ll top off our build with one piece of Slimecraw monster set, just providing a crit chance bonus
| Gear Slot | Type | Set | Trait | Enchant |
|---|---|---|---|---|
 Head Head | Light | Slimecraw | Divines | Max Stamina |
| Shoulders | Medium | Deadly Strike | Divines | Max Stamina |
| Chest Hands Waist Legs Feet | Medium | Ansuul’s Torment | Divines | Max Stamina |
| Neck | Velothi Ur-Mage’s Amulet | Bloodthirsty  | Weapon Damage | |
| Ring Ring | Deadly Strike | Bloodthirsty | Weapon Damage | |
| Front Main Hand | Dagger | Deadly Strike | Nirnhoned  or Precise | Poison |
| Front Offhand | Dagger | Deadly Strike | Charged | Flame |
| Back Weapon | Inferno Staff or 2H Sword or Bow | Crushing Wall (or Merciless Charge) (or Thunderous Volley) | Infused | Weapon Damage |
Alternatives
A variety of additional options listed here
Be wary of sets that require light or heavy attacks to activate them. Arcanists do fairly few light attacks due to their long Fatecarver channels, and so will not be able to proc these sets as often as other classes. In particular, sets that require multiple stacks of light attacks to fully proc (like Arms of Relequen or Kinras’s Wrath) are going to perform especially poorly. This limits our set options, but the sets listed below will perform fine for Arcanists
- Five-Piece Sets
- Whorl of the Depths: Excellent alternative to Ansuul, providing a proc to do large amounts of extra damage. However, Depths is a light armor set. To maintain your medium armor setup, you’ll need to use Depths on your jewelry and weapons, and swap Deadly to your body pieces
- Azureblight Reaper: One of the #1 best sets for fighting lots of enemies together. Does lots of extra AoE damage
- Coral Riptide: Provides a huge stat bonus as long as you can keep your stamina meter low. This set provides some of the very strongest damage, but only if you can keep your stamina constantly low without running out; most people will do better with a set that doesn’t have such a challenging gimmick
- Arena Weapons
- Merciless Charge (2H): Enhances the Critical Charge 2H skill to give you a bonus to all of your direct damage while that skill is active
- Thunderous Volley (Bow): Enhances the Volley bow skill with a ramping damage increase
Note that arcanists normally don’t use two-piece monster sets, since this will force them to give up either the Velothi mythic or a five-piece set to make room. In addition, many good monster sets proc from light attacks, which as mentioned above will yield lesser performance on arcanists
Skills and Passives
All About Crux
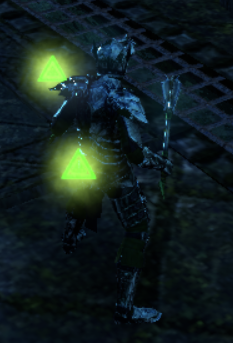
Crux is a special resource the arcanist can use, and is a special gimmick that will let us generate lots of extra damage. Certain abilities will create a crux when used, and other abilities will spend that crux to become more powerful. The crux you have will be shown by green triangle runes floating around your character; you can also download addons like Crux Counter to show your crux count in other ways
You can hold up to three crux at once; you won’t be able to generate any more past this limit
For a DPS build, we will be generating crux with our spammable (usually  Cephaliarch’s Flail), and using that crux to enhance our
 Fatecarver beam. Every crux we have available to spend when we cast Fatecarver will increase its damage by 33%, offering essentially double damage if we cast it with full three crux

As further incentive to utilize the crux mechanic, several passives in the arcanist skill lines give you bonuses for generating or spending crux, in the form of extra resources (Hideous Clarity), extra damage stats (Fated Fortune), and extra ultimate (Implacable Outcome)
Skills
I’m listing way more skills than will actually fit on your bars, just to emphasize how many good options there are. See Example Bar Setup below for a specific example of a bar setup, but ultimately you can just pick whatever skills you like best!
Choose a spammable
This is our main crux generator. The arcanist playstyle somewhat pigeonholes us into using a class skill, since others won’t generate the crux we need to enhance our Fatecarver beam
- Cephaliarch’s Flail: This skill does it all: deals respectable damage, generates a crux, heals you, and debuffs enemies to make you deal 5% extra damage to them with all your abilities. On top of that, it cleaves to hit all enemies in front of you, rather than hitting just one target like most spammables. The one drawback of this skill is its cast time, but its absolutely overpowered menagerie of effects more than makes up for this
 Escalating Runeblades: This is an alternative to Cephaliarch’s Flail, but is definitively inferior in most ways. While capable of a little more raw damage, it lacks the 5% damage debuff, the heal, and most of the cleave damage that Flail has. It does, however, have longer range and no cast time. In general, you should just use Flail unless you really find its cast time bothersome
Choose a Fatecarver morph
This skill is the core of our build, capable of dealing upwards of 40-50% of our total damage
- Pragmatic Fatecarver: A 4.5-second-long channeled beam that obliterates everything in front of you. Cast Fatecarver with crux available to make it deal 33% more damage for each crux. The Pragmatic morph also spends less stamina if you cast it with crux, and gives you a huge damage shield while the beam is channeling. With Pragmatic you’ll be fairly tanky
- Unlike most skills, Fatecarver will slowly drain your stamina over its duration, rather than having one big upfront cost
- Exhausting Fatecarver: No shield or cost reduction, but the channel will last up to one second longer (if you have full crux) to do more damage
- The damage increase from using this morph is usually hardly noticeable except at very advanced levels of play. Most people will get much more benefit from Pragmatic’s shield
Choose some DoTs
Fill up the rest of your skill slots with DoTs, and optionally utility skills (see below)
 Inspired Scholarship: This important skill has several features. It deals out damage every few seconds as long as we’re using other class abilities (which we most certainly will be), and gives us the Major Brutality/Sorcery damage buffs. Most importantly though, it generates a crux whenever our class skills do damage while our crux is at zero. This will effectively allow us to only cast our crux spammable twice instead of three times to fill up our three crux
- Normally what will happen is our crux will drop to zero as soon as we cast Fatecarver, and while Fatecarver is channeling it will cause Scholarship to generate one crux back
- Or, if we cast our spammable while our crux happens to be empty, we’ll generate two crux instead of one
- Scholarship will only generate a crux if our crux is empty, so if Scholarship isn’t active when you generate your first crux, you’ll miss your chance for that extra crux. Make sure to keep this skill running!
 Fulminating Rune: Deals good AoE DoT damage, and offers your group a synergy to put out even more damage
- Elemental Blockade: Great AoE DoT
- Unlike other classes, arcanists usually prefer the longer-duration morph so that we can spend more time casting our higher-damage Fatecarver beam
 Barbed Trap: Provides Minor Force to increase your crit damage, as well as applying a DoT
 Quick Cloak /
  Deadly Cloak: Good AoE DoT that also protects you with Major Evasion. Deadly will do more damage, but Quick will last longer and also give you a movement speed boost
- Unlike other classes, arcanists usually prefer the longer-duration morph so that we can spend more time casting our higher-damage Fatecarver beam
 Scalding Rune: Decent AoE DoT. Has a small radius but is good for a little extra damage
 Anti-Cavalry Caltrops: Decent AoE DoT
Choose some utility skills (optional)
Miscellaneous skills you can use for buffs and extra damage
 Banner Bearer [scribed version]: For this scribing skill, use the scripts as listed below to provide several passive buffs to both yourself and allies near you. Banner Bearer comes at the cost of some resource sustain, so you may need to make an adjustment or two elsewhere to keep up your resources
- Scripts
- Focus:
 Multi-target will increase AoE damage for all allies standing near you
 - Signature:
 Class Mastery will give us the huge benefit of a free crux every 5 seconds, allowing us to cast Fatecarver more often without needing to manually build as much crux
 - Affix:
 Savagery and Prophecy will provide us (but not allies) with Major Savagery/Prophecy damage buffs
- Focus:
- Other script setups may also be useful in some scenarios, but this will be a high-performing option in general.
 Heroism Affix is a particularly strong alternative to give you (and allies in range) Minor Heroism, if you can set up an alternative source of Major Savagery/Prophecy
- Note: An affix for a Major buff like Major Savagery/Prophecy will apply to only you. An affix for a Minor buff like Minor Heroism will be given to allies as well
- Banner must be slotted on both your bars, or else it will un-summon when you swap
- Scripts
 Camouflaged Hunter: You can slot this skill passively for its Major Savagery/Prophecy damage buffs. (No need to cast this skill; it’s just for the passive buffs)
 Resolving Vigor: Powerful heal skill. Also protects us with Minor Resolve
 Zenas’ Empowering Disc /
  Reconstructive Domain: Provides your group with sustain buffs and the rare Minor Courage buff for extra damage. This powerful skill is a staple in most trial groups. Zenas’ is often the stronger choice, letting your allies keep the debuffs for a while even if they leave its AoE circle, but Reconstructive provides healing for your group and can be useful too
 Rune of the Colorless Pool: Debuffs an enemy with Minor Vulnerability and the rare Minor Brittle. This powerful skill is another staple in some trial groups
 Cruxweaver Armor: Protects you with Major Resolve, and generates extra crux if you take direct damage (i.e. non-DoT damage). This skill can be extremely useful if you’re taking hits frequently, as it will let you cast Fatecarver more often
 Runeguard of Freedom: Protects you with Minor Protection, and your whole group with Minor Resolve
 Shrouded Daggers: Mostly useful as a ranged interrupt. Also cleaves to multiple enemies
Choose ultimates
Very high damage skills you can cast when your Ultimate meter is full. Normally you’ll want Tide King or Languid on your backbar, and either Dawnbreaker or Tide/Languid again on your front
 The Tide King’s Gaze /
  The Languid Eye: Deals lots of damage in a small area over 6 seconds. Tide King lasts longer and follows the target if it moves, while Languid stays in place but does increasing damage each tick
- Despite Tide King’s longer timer, Languid will do a little more damage overall; however, Tide King’s target tracking can often make it worth using anyway
 Flawless Dawnbreaker: You can optionally slot this passively on your frontbar for the Slayer passive in Fighters Guild, with Tide King or Languid on your backbar. (You won’t normally actually cast Dawnbreaker; it’s just there for the passive stat boost)
Example Bar Setup
Consider these setups as a template for your own setup; there’s not necessarily a need to follow them exactly. Skills marked “Flex” in particular are good candidates to be replaced with other skills that you prefer, or ones of the opposite stat cost if you’re having sustain trouble
Full Setup
This setup fills up all our skill slots with useful damage skills for maximum damage
| | | | ||
| Cephaliarch’s Flail | Pragmatic Fatecarver | Quick Cloak | Camouflaged Hunter | Shattering Banner [scribing] | Flawless Dawnbreaker |
| | | | | |
| Inspired Scholarship | Elemental Blockade | Fulminating Rune | Cruxweaver Armor | Shattering Banner [scribing] | The Tide King’s Gaze |
If you don’t have ![]() Banner Bearer or appropriate scripts available, you can swap in Barbed Trap on the frontbar and
Banner Bearer or appropriate scripts available, you can swap in Barbed Trap on the frontbar and ![]() Camouflaged Hunter a second time on the backbar
Camouflaged Hunter a second time on the backbar
A two handed backbar can substitute in  Stampede for Elemental Blockade
A bow backbar can substitute in  Endless Hail
How To
Always use The Tide King’s Gaze for your ultimate; Flawless Dawnbreaker is just slotted passively, giving us some extra damage from the Slayer passive
Cephaliarch’s Flail is our spammable. It’ll generate most of our crux for Fatecarver, and you’ll be casting this skill much more often than all other skills. You can also use this skill as an emergency heal
Pragmatic Fatecarver will be doing the bulk of our damage; in fact, our entire rotation will largely be focused on using this skill as much as possible. Just make sure to always cast this skill with three crux; any fewer and you’re missing out on huge extra damage
Make extra sure to keep Inspired Scholarship running, since it’s generating extra crux for Fatecarver
Cruxweaver Armor is also providing us with extra crux when we take direct damage; it also gives us the Major Resolve buff for extra defense
We have a variety of DoT skills ( ) that will put out lots of extra damage throughout a fight
![]() Shattering Banner is giving us passive buffs. Cast it once to summon the banner, and after that just leave it alone and reap its bonuses
Shattering Banner is giving us passive buffs. Cast it once to summon the banner, and after that just leave it alone and reap its bonuses
Simplified Setup
Since so much of our damage is built into Fatecarver, we can whittle down our build to remove some skills and make it even simpler. This setup will be a bit less powerful, but still retain the majority of our damage
| | | | ||
| Cephaliarch’s Flail | Pragmatic Fatecarver | Inspired Scholarship | Camouflaged Hunter | Shattering Banner [scribing] | Flawless Dawnbreaker |
| | | | ||
| Elemental Blockade | Cruxweaver Armor | Ring of Preservation | Barbed Trap | Shattering Banner [scribing] | The Tide King’s Gaze |
If you don’t have ![]() Banner Bearer or appropriate scripts available, you can swap in another Fighter’s Guild skill (
Banner Bearer or appropriate scripts available, you can swap in another Fighter’s Guild skill (![]() ) passively on the frontbar, and
) passively on the frontbar, and ![]() Camouflaged Hunter a second time on the backbar
Camouflaged Hunter a second time on the backbar
A two handed backbar can substitute in Stampede for Elemental Blockade
A bow backbar can substitute in Endless Hail
How To
Always use The Tide King’s Gaze for your ultimate; Flawless Dawnbreaker is just slotted passively, giving us some extra damage from the Slayer passive. For a full one-bar build, just use Tide King as your frontbar ultimate
Cephaliarch’s Flail is our spammable. It’ll generate most of our crux for Fatecarver, and you’ll be casting this skill much more often than all other skills. You can also use this skill as an emergency heal
Pragmatic Fatecarver will be doing the bulk of our damage; in fact, our entire rotation will largely be focused on using this skill as much as possible. Just make sure to always cast this skill with three crux; any fewer and you’re missing out on huge extra damage
Make extra sure to keep Inspired Scholarship running, since it’s generating extra crux for Fatecarver
Elemental Blockade is the most important DoT skill to cast, but even this one can be omitted to simplify even further
Barbed Trap and ![]() Ring of Preservation are just here for passive buffs to our critical chance, and also to our weapon damage through the Slayer passive; you can cast Trap for some extra damage, but neither of these really needs to be casted for this simple setup
Ring of Preservation are just here for passive buffs to our critical chance, and also to our weapon damage through the Slayer passive; you can cast Trap for some extra damage, but neither of these really needs to be casted for this simple setup
![]() Shattering Banner is giving us passive buffs. Cast it once to summon the banner, and after that just leave it alone and reap its bonuses
Shattering Banner is giving us passive buffs. Cast it once to summon the banner, and after that just leave it alone and reap its bonuses
Cruxweaver Armor is optional but will provide us with extra crux when we take direct damage; it also gives us the Major Resolve buff for extra defense
Quick Guide to Skill Casting
Remember, there is a one second global cooldown (GCD) for casting skills. After you cast a skill, you are unable to cast another skill for one second. Therefore, anytime you’re not channeling your Fatecarver beam, it is ideal to cast skills on a consistent rhythm of one skill per second, the maximum speed allowed by the GCD. Consider using a metronome addon to get accustomed to this rhythm
- Naturally, casting this frequently will burn through a lot of resources, but any second where you’re not casting a skill is a second wasted where you could have been doing more damage! But see Sustain Tips below if you’re running out of resources
- Also remember to weave a light attack between each skill. Along with dealing extra damage, this will cause you to generate ult and also assist in applying your weapon enchantments, which are activated by light attacks and weapon skills. A successful weaver will cast one skill and one light attack in each one-second interval (except while channeling Fatecarver)
Rotation
Your main goal in your rotation is to be channeling a three-crux Fatecarver beam as much of the time as possible
If you are using Banner Bearer, a basic rotation that will accomplish this is simply starting your rotation with Inspired Scholarship and then casting in a repeating pattern:
Scholarship will generate your first crux when you do damage with Flail or Fatecarver, and Banner Bearer will generate another crux every 5 seconds, so one cast of Flail will be enough to fill your crux. Make sure to re-cast Inspired Scholarship whenever it runs out, roughly every fourth Fatecarver or so
If you are not using Banner Bearer, you will need an extra cast of Flail to build to three crux, since you won’t have Banner giving you crux:
- Regardless of your setup, try to avoid casting Fatecarver before you have three crux, and absolutely do not cancel Fatecarver while it’s channeling unless you have a really good reason to (e.g. if you’re going to die, or if there just aren’t any enemies nearby to hit). Fatecarver is by far your biggest damage source, and gets much more powerful with crux, so you very much want it to be beaming at full crux as much of the time as possible
- Along the same line of reasoning, try to avoid casting your spammable when you already have three crux. The more time you spend spamming, the less time you’re spending beaming
- If you’re using Cruxweaver Armor and getting damaged often enough to proc its extra crux consistently, you might find that you don’t need to cast Flail at all to get to three crux. However, make sure to use Flail at least once in a while to apply its 5% damage debuff
If you’re using DoTs or buffs, make sure to keep those running too! Anytime you’re not channeling Fatecarver, cast your DoTs and buffs whenever their timers run out
Your priorities in casting your skills are:
- Whenever one of your DoT or buff timers has run out or is about to, cast that skill again to keep it running!
- Whenever your cooldowns are all still running, spam Cephaliarch’s Flail until you have three crux, and then cast Pragmatic Fatecarver when you do have three crux
- Try to avoid recasting DoTs long before their timers expire, unless the enemy has moved out of the skill’s area. This will usually not provide much or any additional damage
You should spend most of your time on your frontbar. Just go to your backbar briefly to refresh skill timers
Casting skills infrequently is one of the biggest things that holds back most DPS from doing lots of damage. Dealing with mechanics and staying out of enemy attacks can take some time to get used to, but once you’re familiar with the fight, pushing your damage skills as close to that one-cast-per-second rhythm as possible will let you put out huge amounts of damage. Don’t spam your skills as fast as possible, since only one skill per second will cast, but don’t cast too slowly either
Priority Passives
All passives are useful for something, but these are the passives that will be most relevant to combat
Herald of the Tome: Everything: Fated Fortune, Harnessed Quintessence, Psychic Lesion, Splintered Secrets
Soldier of Apocrypha: Circumvented Fate, Implacable Outcome
Curative Runeforms: Hideous Clarity, Erudition, Intricate Runeforms
Dual Wield: Everything: Slaughter, Dual Wield Expert, Controlled Fury, Ruffian, Twin Blade and Blunt
Destruction Staff: Penetrating Magic, Elemental Force, Ancient Knowledge, Destruction Expert
Light Armor (only if wearing some light pieces): Evocation, Spell Warding, Prodigy, Concentration
Medium Armor: Dexterity, Wind Walker, Agility, Athletics
Fighters Guild: Slayer, Banish the Wicked, Skilled Tracker
Undaunted: Everything: Undaunted Command, Undaunted Mettle
Assault: Continuous Attack
Racial: Everything
Alchemy (if using potions): Medicinal Use
Character
Race
Racial differences are relatively minimal, so I advise simply picking a race you like. But if you’re wanting to optimize, the best options are:


Attributes
All 64 points belong in Stamina. Your skills do more healing based on your Max Stamina value (or Magicka, whichever is higher), so it is ideal to build one value as high as possible

Mundus Stone
 The Lover
- Gives you extra penetration to shred through enemies’ defenses. This is a great option for (1) when you’re leveling, or (2) when you’re not with a particularly organized group. When in doubt, Lover is likely the way to go
 The Thief
- Increases your critical chance, which is another excellent stat for maximizing damage. This is the best option when you have skill points, Champion Points, and group support invested into maxing out your penetration already
Consumables
Foods/Drinks
 Dubious Camoran Throne: Max Heath/Stamina, Stamina Recovery
- Good for general use, with a good mix of stats and sustain
 Braised Rabbit with Spring Vegetables /
  Garlic Cod with Potato Crust /
  Sticky Pork and Radish Noodles (all equivalent): Max Health/Stamina (CP 150+)
- Use this if you don’t need extra sustain; higher stats but no sustain buff
 Lava Foot Soup-and-Saltrice: Max Stamina, Stamina Recovery
- Use this for low-pressure situations where you don’t need extra survivability; higher stamina and recovery but no health buff
Potions
 Crown Tri-Restoration Potion: Max Health/Magicka/Stamina, Health/Magicka/Stamina Recovery
- Easy free option if accumulated from daily rewards
 Stamina Potion: Max Stamina, Stamina Recovery
- Also a probably-free option that is easily looted from the wild; also craftable
Champion Points (level 50+)
A rough progression of what CP nodes to start with once you hit level 50. You’ll be able to use more and more of these nodes as you gain experience and accumulate more Champion Points. Fill each node completely before moving on to the next one
Warfare 
- Start with Precision and (in the Extended Might sub-tree) Piercing
- Then add these four slottables: Thaumaturge, Biting Aura, Wrathful Strikes, Exploiter (in the Extended Might sub-tree). (Make sure you add them to your Champion Bar or they’ll have no effect!)
- Next grab Tireless Discipline, and also the non-slottable CP from the Extended Might sub-tree (i.e. skip any CP with the “Add to Champion Bar to activate” note)
- Finally add the rest of the non-slottable CP throughout the Warfare tree
Fitness 
- Take these three slottables: Rejuvenation, Boundless Vitality, Fortified. (Make sure you add them to your Champion Bar or they’ll have no effect!)
- Grab Sprinter, Hasty (in the Wind Chaser sub-tree), and Hero’s Vigor
- Take the rest of the non-slottable CP throughout the Fitness tree, including those in the three subtrees
- At some point during the above step, take one more slottable CP of your choice (Celerity (in the Wind Chaser sub-tree), Bloody Renewal, Spirit Mastery are some of the most useful ones)
Craft 
- Use whatever you’d like here; these points mostly don’t affect your combat skill. There are lots of options for crafting, stealth, movement speed, and more in this tree
- Some early nodes I find good for very general usage include Steed’s Blessing, Breakfall, and Wanderer
Sustain Tips
Try to avoid heavy attacking for extra stamina when possible. A heavy or two once in a while is okay, but doing many heavy attacks takes lots of time away that you could be using to cast skills and do more damage. It’s much better to improve your sustain in other ways whenever possible
Need some more stamina sustain? Try these tips, in roughly this priority order:
- Have you bought all your passives? Your Medium Armor and class skill lines in particular have several passives that will give you extra stamina
- Are you using mostly medium armor? If not, consider doing so to get lots of extra stamina from the Wind Walker passive
- Do you have CP points in the Rejuvenation passive (red tree)?
- Are you using several magicka-costing skills like Fulminating Rune and Elemental Blockade? The more you use magicka skills, the less you’ll be using up your stamina
- Are you using food with a stamina recovery buff, like Dubious Camoran Throne?
- Are you using a potion with a stamina recovery buff? If so, do you have the Medicinal Use passive unlocked from the Alchemy crafting skill line? Without this passive, your potions will run out a while before you’re able to drink another one, but it does unfortunately require leveling Alchemy
- Are you using stamina recovery glyphs on some or all of your jewelry? (This is only recommended if needed, since weapon damage glyphs will provide more damage)